Author: admin

  • Tortilla Espanola

    1 Medium yellow or white onion
    2 Cloves of garlic
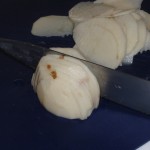
    1 Lb of potatoes, preferably russet potatoes (roughly 2-3 potatoes)
    1 Tsp of kosher salt
    1 Tsp fresh ground black pepper
    1 Tsp of smoked paprika
    4 Large eggs
    2 Cups of olive oil for pan frying
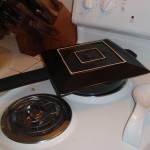
    1 Large plate for help flipping

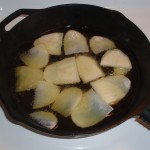
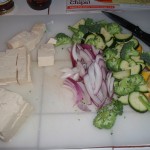
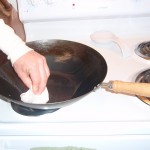
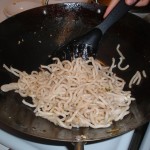
    Peel potatoes and slice thinly making sure to be uniform to ensure potatoes cook evenly. In medium to large frying pan heat olive oil to medium-high heat. If you are unsure, try dropping a single piece of potato in the oil and see if the oil is hot enough to fry. Once the oil is hot enough, place the potato evenly in the oil making sure the oil almost covers the potatoes. Here is a brief video that shows our potatoes frying in the oil. If you are using a medium sized pan, you may have to cook the potatoes in shifts; once the potatoes become soft you can remove them and place them on a paper towel to drain and season with smoked paprika. While the potatoes are cooking you can slice up the onion in to 1/4 inch pieces and also prepare the garlic by mincing. Once the potatoes are done use the remaining oil to cook the onion and garlic until the onion is translucent, when ready remove the onion and garlic and spread across your potatoes. It is important to let the potatoes, onion and garlic mixture to cool so that the ingredients can be mixed with the egg without cooking the egg mixture.

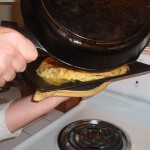
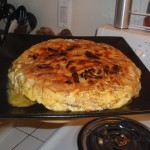
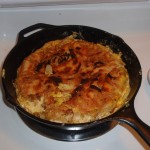
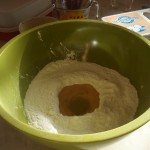
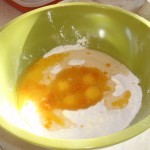
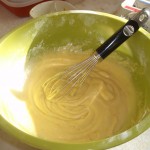
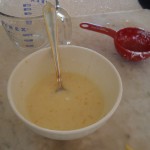
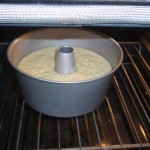
    Next remove the excess oil from the pan, but make sure you still have a nice coat on the bottom to prevent the egg mixture from sticking. Heat the pan to a medium-high temperature to help prevent the egg mixture from sticking to the pan. In a bowl, crack the eggs and scramble adding salt and pepper. Place the potato, onion and garlic mixture in to the pan using a spatula to spread out the mixture and try to eliminate any air space between the slices, quickly pour the eggs into the pan and fry the tortilla for about 3-4 minutes lowering the heat slightly. Periodically shake the pan and/or use a spatula to make sure the tortilla is not stuck to the bottom or sides of the pan. When you are ready to flip, use the large plate you have set aside and lay it upside down over the top of your pan. Make sure everything fits and place your palm on the center of the plate and your other hand on the handle of the frying pan. Quickly invert the pan and the tortilla should come right out. Now return the pan to the heat and slide the tortilla off of the plate and back into the pan to finish cooking for another 3 – 4 minutes. If you had any potatoes come loose in the flip, just lift the tortilla and slide them underneath as the loose eggs will pull them back into form as it cooks. Remove the pan from the heat and let the tortilla rest for a few minutes before removing from the pan.

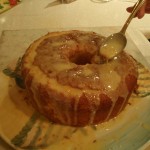
    Prepare sliced baguette to accompany the tortilla presentation.

  • Tofu and Vegetable Stir Fry with Udon Noodles

    1 19 Oz Package of firm tofu
    1 Package of udon noodles
    1 Cup snow peas
    1 Cup of broccoli florets
    1 Cup of bean sprouts (white)
    1/2 Cup sliced zucchini
    1/2 Cup sliced Italian squash
    1/4 Cup white onion
    1/2 Cup of stir-fry sauce, preferably Spicy Szechuan if you want to heat things up!
    2 Tbsp of peanut oil

    Heat peanut oil in the bottom of a medium to large wok. We usually use 3/4 of the 19 Oz package of tofu, it is really personal preference add as much as you like! Cut tofu into roughly 1/2 inch cubes and – when the oil gets hot – add tofu to the wok (take care to not splash oil). Cook tofu for about two minutes and then add vegetables, stirring all ingredients together. Continue to stir and slowly add stir fry sauce making sure to coat everything evenly. Cover wok using a wok cover or a regular pasta/soup pot cover to create some steam that will cook the vegetables, cook with cover on for about 3 minutes. Temporarily transfer the contents of the wok to a bowl and add peanut oil to the wok and prepare to heat the udon noodles by removing from the package and separating the strands as best as possible without breaking. Add noodles to the wok and cook on a medium-high temperature for 1 min; add additional stir fry sauce to noodles if desired. Once the noodles are warm, add the original ingredients back to the wok and stir everything together thoroughly. Heat all ingredients together for a few minutes and your are ready to serve.

  • Tangerine Chiffon Cake

    This recipe is adapted from Good Housekeeping

    Cake

    4 Tangerines or 3 large oranges
    2 1/4 Cups of cake flour
    1 Tbsp baking powder
    3/4 Tsp salt
    1 1/2 Cup granulated sugar
    5 Large eggs (separated)
    2 Large egg whites
    1/2 Tsp cream of tartar

    Tangerine glaze:

    2 Tangerines or 1 large orange
    1 1/2 Cups of confectioners sugar
    1/4 Tsp vanilla extract

    Preheat oven to 325 F. Grate 1 Tbsp of zest from tangerines and squeeze 3/4 cup of juice. In a large bowl stir baking powder, flour, salt and 1 cup of sugar. Make a well in the center and add oil, egg yolks, tangerine zest and juice. Whisk into dry ingredients.

    In another large bowl, with a mixer on high, beat 7 egg whites with cream of tartar until soft peaks form. Gradually sprinkle in remaining 1/2 cup of granulated sugar a little at a time and beat until whites stand in stiff peaks when the beaters are removed. Use a rubber spatula to gently fold 1/3 of the whites into the egg-yolk mixture to loosen the batter, then fold in the remaining whites.

    Pour batter into ungreased 10-inch angel food cake pan. Bake 60 – 65 minutes or until the top springs back when touched gently. Invert cake pan on a metal funnel or bottle; cool thoroughly for an hour or two. With a knife, carefully loosen cake from the pan on both the side and the center. Remove cake from the pan and place on a plate.

    Prepare glaze by grating 1 Tsp of zest and 2 and 1/2 Tbsp of juice. In a small bowl stir together confectioners sugar, vanilla, tangerine zest and 2 Tbsp of tangerine juice until smooth. Add remaining juice if necessary to get a nice smooth texture for spreading. Spoon glaze over cooled cake, spreading with a spatula and allow glaze to run down the sides. Let stand until the glaze is set which is about 30 min.

  • ABT’s Cinnamon and Espresso Chocolate Chip Cookies

    This recipe is from ABT and was adapted from Absolutely Chocolate from Fine Cooking

    2 Cups unbleached all- purpose flour
    1/2 Tsp Baking powder
    3/4 Tsp ground cinnamon
    1/4 Tsp salt
    10 Oz unsalted butter (at room temperature)
    3 Tbsp espresso grounds (fine – use grinder or food processor if necessary)
    1 Cup confectioners sugar
    1/2 Cup confectioner’s sugar
    1 1/2 Cup semi-sweet chocolate chips
    1/4 Cup of sugar for decoration

    Preheat oven to 350 F. In a medium bowl, combine flour, baking powder, cinnamon and salt. In a larger bowl, beat the butter and espresso grounds until combined. Add the brown sugar and the confectioner’s sugar and beat until combined. Stir in the flour mixture about 1/2 a cup at a time and mix well as you add. Next, add the chocolate chips and mix well.

    Put the granulated sugar in a small bowl. Scoop out 1 round Tbsp of dough and and flatten slightly. Dip one side of the dough into the granulated sugar and set sugar side up on an un-greased baking sheet. Repeat with the remaining dough, spacing the discs about 2 inches apart. Bake until the edges start to darken, 12 – 14 minutes.

    Place paper-towels 2 cooling racks. Remove the cookies from the oven and let them cool on the baking sheets for a few minutes before transferring to the cooling racks.

    Cinnamon and Espresso Chocolate Chip Cookies
    Cinnamon and Espresso Chocolate Chip Cookies
  • Grilled Chicken with Lemon, Garlic, Rosemary and Sage

    2 Bone-in chicken breasts (with skin)
    2 Sprigs of rosemary (or one large one halved)
    1 Clove of garlic
    1 Sprig of sage
    1 Fresh lemon
    1 Tbsp olive oil
    1/4 Tsp kosher salt
    1/4 Tsp freshly ground black pepper

    Prepare the chicken by trimming off excess fat. Slightly separate skin from flesh and lightly brush both breasts on the flesh with olive oil. Add salt, pepper and coarsely chopped garlic. Slice lemon into whole rings thin enough to slide under the skin. Insert rosemary and sage sprigs between the skin and the flesh and then add one to two lemon slices, press the skin and all ingredients to the flesh slightly to secure. Refrigerate for several hours if possible to increase flavor.

    Prepare charcoal for medium to medium-high heat or pre-heat your gas grill to medium or medium-high heat. Place breasts on the grill bone side down, positioning the thicker part of the breasts over the hotter portion of the grill. After about 5-7 minutes flip the breasts so they are skin side down and position the breasts so the thicker portion is still over the hotter portion of the grill. The skin should be fine, but in case it creates flare-ups it may be good to keep a spray-bottle full of water nearby to extinguish flare-ups. After 6 Minutes flip the breasts back to bone side down position and continue to grill them for another 8-10 minutes depending on thickness. On average you will need to grill medium sized bone-in breasts for 22-25 minutes. If the meat is charring slightly you can move the meat toward the cooler sections of the grill. Remove meat from the grill and let rest for several minutes. Remove skin before serving, leaving lemon and rosemary for presentation.

  • The move is done!

    Sorry for the time away, but we have moved our HQ from San Diego to San Francisco. We are very excited about the move and everything has been falling into place slowly but surely. Many thanks and big love to all of our friends, restaurateurs and supporters in San Diego; we will miss you, but trust that we will be back often to check on you. Keep it locked on here at trueplayerflavor.com for a fresh set of recipes and some images from our adventure getting out of SD and into SF. We will also be checking out our new friends in the bay area and posting some of our discoveries.

  • Boiled Artichokes

    2 Medium or large artichokes

    Take care to snip the spikes off of the leaves by cutting off the very tips. Also cut the stem off of the artichokes, and be sure to level the cut so that the artichokes will sit flat in the bottom of the pot. Push down on the top of the artichokes slightly to open up the internal leaves slightly.

    Place the artichokes in a pasta pot and fill the pot with water until the level covers roughly 2/3 of the artichokes. Turn the heat to medium-high and bring to a steady boil for 45 minutes or until tender and leaves can be easily pulled from the base. Cooking artichokes is an inexact science that varies based on size of the artichokes, so as you approach the 45 min pull leaves to see how done they are. Remember, practice makes perfect so fire up artichokes as often as you can and be sure to check out our favorite Lemon Basil Curry Aioli for dipping. Another option is a basic garlic and melted butter dipping sauce.

    Boiling Artichokes
    Boiling Artichokes

  • Lemon Basil Curry Aioli

    The quantities used in this recipe are based on 2 – 4 people.

    1/2 Cup light/canola mayonnaise
    2 Tsp fresh squeezed lemon juice
    2 Fresh basil leaves, minced
    1 Tsp of Curry powder (adjust to taste)

    Add lemon juice, curry and basil leaves to the mayonnaise and whip the ingredients together. Refrigerate to chill and let the flavors develop.

    We love this aioli with artichokes, asparagus, broccoli…essentially great with your go to green veggies!

    Lemon Basil Curry Aioli
    Lemon Basil Curry Aioli
  • Fresh Mint Sauce

    3 Cups of fresh mint leaves
    3 Tbsp of granulated sugar
    4 Tbsp of white balsamic vinegar (or your preferred vinegar)
    1 Tsp of olive oil

    Wash fresh mint and add to the food processor along with sugar and pulse several times. Heat vinegar over low flame until warm and add to the food processor along with the olive oil, scraping the sides with a spatula to mix the mint and sugar with the vinegar. Pulse the mixture several more times and transfer to a bowl. Sauce can be served warm, or chilled. We suggest storing in the refrigerator for at least an hour so the flavors can blend together.

  • Grilled Rack of Lamb

    This is a decadent recipe we usually reserve for special occasions such as a birthday or anniversary. We usually opt for the traditional lamb chop, however, this time we decided to try the rack, and we were blown away by the results.

    2 Racks of lamb with roughly 6 to 8 bones in each
    1/2 Cup Italian seasoned breadcrumbs
    1/4 Tsp ground allspice
    1/2 Tsp no sodium spice mix like TJ’s “21 Spice Salute” or Mrs. Dash type product
    1/4 Tsp fresh ground black pepper

    Prepare rub by mixing the dry ingredients together and sprinkling on both sides of the meat. Gently press the rub into the flesh and apply evenly all over the meat.

    Next prepare charcoal or preheat gas grill to medium heat. While grill is preheating carefully wrap the tips of each bone in the rack of lamb with about a 2 x 2 square of aluminum foil to prevent charring or burning. Make sure you cover those bones or you will regret burning the tips and make a mess particularly if you are serving as an hors d’oeuvre.

    Place both racks on the grill facing opposite each other with the bones on the cooler side of the fire and the meat towards the hotter side. Grill lamb for 8-9 minutes a side and keep a close eye on the fire since fat drippings can intensify the fire and char the meat; you should consider keeping a small spray bottle of water next to the grill to tame the flames if necessary.

    Remove meat from the grill and rest for close to 10 minutes – I know it is hard to resist, but the reward is worth the wait. After the meat has rested, using a sharp knife, carefully cut the rack up by slicing through the membrane connecting each rib. We highly suggest serving with a homemade mint sauce.