Author: admin

  • Waffle Cone Cannolis

    1/2 Cup semisweet chocolate chips
    8 “waffle” ice cream cones
    2 Tbsp pistachios, smashed
    8 Oz cream cheese, softened
    1 Cup ricotta cheese (skim milk)
    1 1/2 Cups confectioner’s sugar
    1/4 Tsp almond extract
    2 Tbsp semisweet chocolate chips

    Line a cookie sheet with waxed/parchment paper. If working with whole pistachios, place them in a small ziploc and smash them using a meat tenderizer.

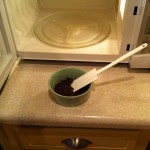
    In a small microwave safe bowl, microwave the 1/2 cup chocolate chips on, in 10 second intervals, stirring, until melted. Dip – or paint with rubber spatula – the top 1 1/2″ of the waffle cone into the chocolate and immediately sprinkle with the smashed pistachios. Place on the wax paper lined pan to harden.

    Beat the cream cheese, ricotta cheese, icing sugar and almond extract until smooth.

    Transfer to a pastry bag or use a ziploc bag and snip the corner.

    Pipe the filling into the cones.

    Sprinkle with the remaining chocolate chips and chill for at least 30 minutes before serving.

  • Mixed Berry Crumble

    2/3 Cup plus 3 tablespoons sugar
    2 1/2 Tbsp cornstarch
    1 Tsp finely grated lemon zest
    2 Tbsp fresh lemon juice
    5 Cups fresh combination of mixed berries, we used blueberries, raspberries and strawberries
    3/4 Cup unbleached all-purpose flour
    3 Tbsp (packed) light brown sugar
    1/2 Tsp cinnamon
    1/4 Tsp salt
    5 Tbsp unsalted butter, melted, cooled slightly

    Preheat oven to 375 degrees.

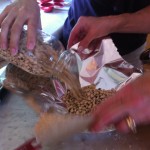
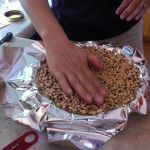
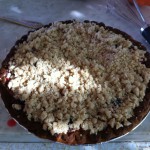
    For the crust we were bought a pre-made crust in a pan. To prepare we filled the pre-made crust with black-eyed peas on a layer of parchment backed aluminum foil to keep the shape of the crust while backing the dough.

    Filling and Topping:

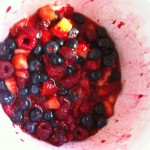
    Whisk 2/3 cup sugar, cornstarch, and lemon zest in a large bowl. Add berry combination and lemon juice; toss to coat and evenly distribute. Let filling stand at room temperature, tossing occasionally, until berries release their juices, 20-30 minutes.

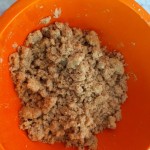
    Whisk remaining 3 tablespoons sugar, flour, light brown sugar, cinnamon, and salt in a medium bowl. Add melted butter; mix ingredients with fingertips to blend.

    Pour/spoon berry filling into crust, then sprinkle topping over. Bake pie until filling is bubbling and topping is browning/golden, about 75 minutes. After about 30 minutes we checked in 15 minute increments to ensure the crust wasn’t burning or the mixture bubbling over. Consider lining your oven bottom or using a cookie sheet to protect against drippings/burning.

  • Caprese and Egg White Breakfast Sandwich

    Bread is optional, if you are looking for a low carb and low cal breakfast try without the bread or bun! In this version we used bagel thins.

    1/2 Pint of grape tomatoes, halved
    1 Tbsp butter
    1 Clove of garlic, crushed
    1 Tbsp chopped basil
    1 Cup of egg whites
    2 Tbsp of shredded mozzarella
    4 Slices of bread/roll of choice

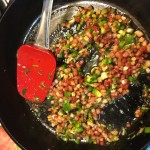
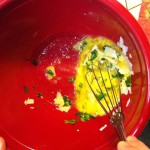
    Saute tomatoes, garlic and basil in melted butter over medium heat. When tomatoes are soft, add egg whites and fold ingredients together to ensure even distribution. Cook until eggs are done and remove from heat. Remember egg whites cook quickly, so keep an eye on them. Add cheese to the hot eggs so that it melts slightly. Load eggs onto bread, cut and serve!

    Caprese and Egg White Breakfast Sandwich
    Caprese and Egg White Breakfast Sandwich
  • Linguine Carbonara

    6 Chopped bacon slices or 1 Cup of diced pancetta
    2 Tbsp olive oil
    4 Crushed garlic cloves
    1/2 Tbsp minced rosemary
    1 minced/seeded jalapeno (optional)
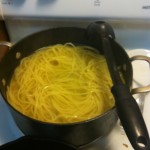
    2/3 Lb cooked linguine
    3 Eggs
    3/4 grated Parmesan/Agiago/Pecorino cheese blend
    2 Tbsp chopped Italian parsley
    Pinch of pepper

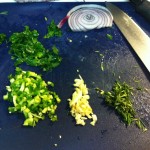
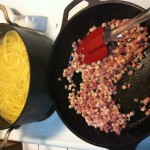
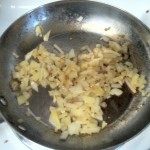
    Combine first five ingredients and 1/4 cup of water in a skillet. Cook over medium-high heat so the water evaporates and the bacon/pancetta crisps; about 12 minutes. If using pancetta, you may want to crisp it slightly before adding the water and other ingredients just to give it a head start.

    Add cooked linguine to the skillet and toss. In a separate bowl, whisk eggs, cheese, parsley and pepper together and whisk in 1/4 cup of pasta cooking water. Toss with pasta until creamy.

  • Waffles with Fruit and Yogurt Parfait

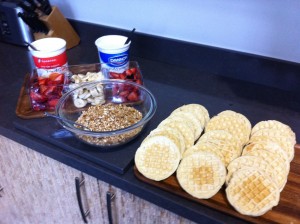
    This is a great option for hosting a breakfast for a dozen or so people if you have access to toasters. I recently hosted a breakfast presentation at work and laid out the Waffles with Fruit and Yogurt Parfait and it was a big hit with the team. People who wanted a hearty breakfast piled fruit and yogurt onto a waffle, and those looking for a light and nutritious (yet filling) option went with the parfait. One other advantage of the yogurt parfait is how easy it can be enjoyed while participating in a group meeting, no mess. Great for a work scenario or a social brunch on the weekend.

    1 Package of 24 frozen waffles
    1 Bunch of bananas
    2-3 Pints of strawberries
    2 Quarts of yogurt (try to get two flavors to provide options)
    1 Box of Kashi GoLean Crunch (or traditional granola if preferred)
    1 Bottle of preferred maple syrup

    Slice fruit and place into separate bowls with serving spoons. Open yogurt and either spoon into separate bowls or just include spoon and serve from containers as-is. Pour cereal into large bowl and include a spoon for serving.

    On a large plate or cutting board, remove waffles from package and stack them for easy access. Place waffle tray next to or near toasters so that people can easily toast and build their fruit and yogurt waffles.

    For parfait, ideally you can provide glass cups for people to build their parfait, but if glass is not available a regular plastic or ceramic cup will work just fine. With the same ingredients laid out for the waffle, people can make a parfait by taking a glass, filling it with a base of yogurt, adding fruit and then sprinkle cereal on top!

    Waffles with Fruit and Parfait
  • Tom’s Award Winning Beans & Greens

    2 Cans of Low Sodium White Beans
    1 Lb of Mild or Hot Italian Sausage
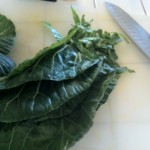
    1 Cup of Chopped Collard Greens
    1 Cup of Chopped Onion
    2 Cloves of Minced Garlic
    1 box of Low Sodium Chicken Stock
    1/2 Cup of Sugar

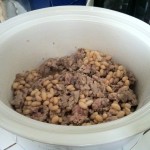
    To begin making this easy and delicious soup, start by adding the beans to your slow cooker, which is set to Low. On the stove top, cook the sausage until almost cooked through and then add to crock pot with the beans. In the drippings of the sausage, cook the onions and garlic until translucent. Add the onions and garlic to the crock pot. Add the chicken stock and collard greens at this time. Add the sugar, which will combat the bitterness of the greens.

    Cook on Low for 4-6 hours or until greens have cooked down. This soup is that easy! Feel free to serve with a sliced baguette.

    This recipe was told to us by Tom from Nashville, a wonderful winemaker at Martin Ray Winery in Sebastopol, CA.

  • Basil and Goat Cheese Stuffed Pork Tenderloin

    1 1-1.5 Lb Pork Tenderloin (for 2)
    1 Tbsp chopped garlic
    3/4 Cup chopped basil
    3/4 Cup crumbled goat cheese
    1 Tsp lemon pepper
    1 Tsp salt
    1 Cup of grape tomatoes
    Cooking twine or bamboo skewers for roast

    Pre-heat oven to 375. Cut tomatoes in half, toss with (olive oil – pinch of salt/pepper) and arrange on cookie sheet or roasting pan. Once the oven is ready, place the tomatoes in the over for about 10 – 15 minutes or until nicely roasted.

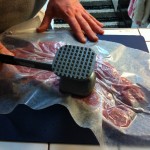
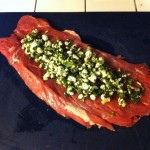
    Butterfly pork tenderloin using a sharp knife. Place sheet of wax/parchment paper over the butterflied pork and use a mallet to flatten out the roast. Be sure to flatten the roast evenly so when you roll the roast together with the filling inside the meat will cook evenly.

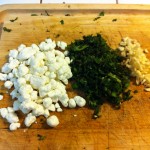
    Combine the garlic, basil, goat cheese, salt and pepper in a bowl and mix well until the ingredients are evenly distributed.

    Spoon mixture evenly into the middle of the flattened pork roast and roll the meat until the roast is evenly closed and the mixture is sealed inside. Place the meat in a roasting pan and bake at 375 for about 25 minutes. Remove from the oven and let the meat rest for a few minutes and top with roasted tomatoes.

  • Beef Roast Tacos

    This recipe is adapted from Tyler Florence’s “Mexican Pot Roast Tacos” from Dinner at My Place

    2-3 Lbs of beef roast
    1 Tsp Kosher salt
    1 Tbsp fresh ground black pepper
    1 Large onion, cut into wedges
    3 Cloves of garlic, smashed
    1 28-Oz can of whole, peeled tomatoes
    1 Dried jalapeno
    1 Tbsp ground cumin
    1 Tbsp smoked paprika
    1 Tsp ancho chile powder
    1/2 Bunch fresh cilantro
    2 Tbsp red wine vinegar
    8 Corn tortillas
    1/2 Bunch fresh cilantro
    1/3 Lb of Cotija cheese, crumbled
    2 Limes cut into wedges

    Salt and pepper beef roast on all sides. Set pot on range and heat to medium-high with a drizzle of olive oil in the bottom. Brown roast on all sides until there is a nice brown crust – roughly 2 min a side. Add garlic and onion to the bottom of the pan while browning the roast so they begin to caramelize slightly. Once browning is complete add tomatoes and juice to the pot. Also add cumin, ancho chile, smoked paprika, dried jalapeno and cilantro. Also add about 2 cups of water and lower heat to low and simmer for 2 hours – until beef is fork tender. Once cooked, use a fork or spoon to break apart the roast and allow some time for beef to soak up the juices.

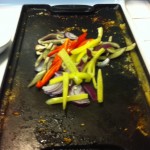
    To prepare the tortillas, ideally, use a cast-iron piastra on the stove top and warm the corn tortillas on each side. If you don’t have a piastra, a cast-iron skillet will work. If not a regular skillet will work just fine!

    Once you are ready to plate the tortillas, scoop the beef into the tacos and sprinke with Cotija cheese and fresh cilantro.
    Browning the Roast
    Adding Tomatoes and Cilantro

  • Chicken Chipotle Nachos with Cilantro-Avocado Crema

    1/2 Cup chopped onion
    1 Tbsp olive oil
    1/2 Tsp cumin seed
    1/2 Tsp dried oregano
    1 Canned chipotle chilies in adobo, chopped
    2 Tbsp tomato paste
    1 Tbsp white wine vinegar
    1/2 Cup water
    2 Cups shredded cooked chicken
    ‘A couple dozen’ tortilla chips
    1 1/2 Cups shredded jack cheese (about 6 oz)

    Boil chicken in medium sauce pan for 8-10 minutes, remove from water and set aside to cool. Once cooled, shred the chicken using two forks and set aside.

    In a skillet heat olive oil and add onions and cook until they begin to brown. Add cumin seeds and oregano, stir for a minute, then add chilies, tomato paste, vinegar and 1/2 cup of water. Bring to a boil, then simmer gently stirring often to blend flavors, about 5-6 min. Add shredded chicken and stir until hot.

    Preheat oven to 450 and arrange tortilla chips in a single layer on a cookie sheet. Sprinkle equal portions of cheese on each chip, then spoon 1 tablespoon of chicken on top of each chip.

    Bake for about 5-6 minutes (should be slightly bubbly). When done, transfer to a serving platter and top each with 1 teaspoon of the cilantro-avocado crema. Garnish with a cilantro leaf and serve warm.

    For the cilantro-avocado crema:

    This can be made up to 2 hours ahead of time. Mix 1 ripe diced avocado, 2-3 tablespoons of sour cream, 1 tablespoon finely chopped fresh cilantro, 1 tablespoon of lime juice. Add salt to taste.

  • Salsa Verde Take Two

    You know the drill! We tweak this salsa verde recipe constantly because we have not quite reached the goal, which is to duplicate the amazing flavor of the famous Santana’s salsa verde. This time I roasted all of the ingredients under the broiler, including the garlic!

    1 Lb (about 10) tomatillos
    2 Roma tomatoes
    3/4 Cup of fresh cilantro
    4 Cloves of garlic (peeled)
    1/4 Tsp kosher salt
    1 Jalapeno pepper
    1/2 Large white onion
    2 Tbsp fresh lime juice

    Peel husk from tomatillos and wash thoroughly. Place tomatillos, tomatoes, sliced onion and garlic cloves on cookie sheet or broiler pan. Place under the broiler for about 8-10 minutes or until the skin of the tomatillos is blackened. EVERY broiler is different, so keep an eye on the tomatillos after about 5 minutes just to make sure. Remove ingredients from the oven and let cool for a few minutes.

    Combine the ingredients in food processor and blend. Use a spatula to scrape the sides of the food processor to make sure everything blends evenly. Pour contents of the food processor into a bowl and let cool. Salsa is ready to use after it cools, however, we have found that flavor improves if the salsa is refrigerated over night.